

Are you looking for a versatile tool to showcase your work and create an impressive portfolio? Look no further than Google Sites! This amazing tool allows you to easily compile all your productions and create a stunning portfolio. But it doesn’t stop there – Google Sites can also be used for web design, evaluation methodologies, co-evaluation, and self-evaluation.
By using Google Sites, you will not only develop your students’ digital skills but also provide them with a safe environment to establish their digital identities. It fosters collaboration and teamwork among students as they can work together on the same project.

The Versatile Tool
Google Sites is a free online application included in G Suite that allows you to create web pages effortlessly. You can create a website as easily as editing a document. With Google Sites, you can gather various information such as calendars, videos, presentations, text files, spreadsheets, and more in one place quickly.
The aim of Google Sites is to enable anyone to create and share a site effortlessly, be it with a small group of collaborators, an entire organization, or the whole world.
Here are some key features of Google Sites:
- It is available with any @gmail.com or G Suite account.
- If you don’t have a Gmail or corporate account, you can register with any other type of email account.
- You don’t need programming knowledge like HTML or CSS, although it does allow you to integrate code in some sections.
- It offers a variety of themes to choose from to customize the look and feel of your site.
- It seamlessly integrates with Google Drive, allowing you to easily insert files of any type.
- It uses Google’s powerful search technology to search for content within Google Sites.
- You can assign custom names within the general domain.
- Users can easily manage permissions and file ownership. Google Sites has different privacy levels to ensure the security of your students within the environment (only with a link, specific users, organization members, or the general public).
- Inserted content retains its original permissions for reliable and precise control.
- It is optimized for viewing on different devices, including computers, tablets, and smartphones.
- You can create and edit content by simply clicking and dragging elements. The content is automatically rearranged using a grid layout. All elements are placed in the most appropriate position, and you can easily move, resize, or rearrange them.
Google Sites simplifies collaboration by allowing multiple users to edit documents simultaneously in real-time. It offers three permission levels: owner, editor, and viewer. Owners have full permissions to modify the design and content of the entire Google site, while editors cannot change the site’s design. Viewers can only see the site and do not have permission to make changes.
Additionally, Google Sites allows you to duplicate already created sites to create copies or templates for building new web spaces.
Educational Applications
In an educational context, Google Sites is a powerful tool for creating digital portfolios for students. Whether you use Google Sites for free with a Gmail account, which allows a maximum size of 100 MB per website and 20 MB per attachment, or with G Suite for Education, which provides unlimited storage space, you can easily organize all your content in one place.
You can access Google Sites from a computer, phone, or tablet. However, website modifications must be done on a computer. Google Sites is compatible with the latest versions of popular browsers such as Google Chrome, Mozilla Firefox, Internet Explorer, Microsoft Edge, and Safari. Make sure you’re using the right browser version and that cookies and JavaScript are enabled to make edits.
In an educational setting, Google Sites can be used in various ways:
- Showcasing and presenting websites created by teachers for different subjects and areas. This way, students at all educational levels, including kindergarten, don’t have to search for content in unfamiliar places. They can find all the selected links and materials in one trusted location.

- Creating portfolios, web spaces, blogs, or presenting organized and systematic works with students from the upper years of primary education.
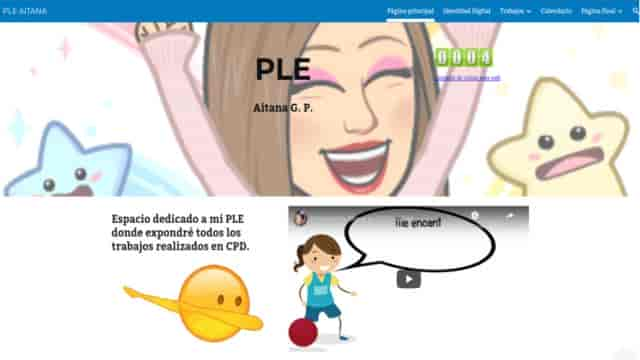
- Creating a Personal Learning Environment (PLE) at the end of primary education to document their digital identity, compile their main digital works, and showcase galleries of images or videos they have created. This way, everything can be stored securely with the appropriate levels of privacy.
- Providing families with all the information they need, such as tutorship updates, program guidelines, evaluation criteria, review and extension activities, images from the classroom, student videos, and productions. This information can also be shared securely, adapting the level of privacy according to the age of the students.
Google Sites is recommended for use in all subject areas and is suitable for any theme and age group. It acts as a content aggregator, making it easy to incorporate and present any type of content.
To get started with Google Sites, there are two different approaches, depending on whether you want to view, collaborate, or create content:
- To view content, simply familiarize students with navigating Google Sites and teach them how to bookmark pages for quick access.
- To create content and collaborate, organize training sessions on using the tool.
Currently, there are two versions of Google Sites: the classic version and the new Google Sites. Let’s focus on creating sites with the new version.
Here’s a step-by-step process to help you and your students get started:
- Open the new version of Google Sites on a computer.
- Create a new website.
- Give your website a title.
- Choose a theme that suits your style.
- Establish the structure of your website, including the main page, additional pages, and subpages.
- Start adding content to your site using the “Insert” option.
- To publish your changes, click “Publish” and choose a URL name.
- If you want to add collaborators with editing or viewing privileges, use the “Share” option and add their email addresses.
With students, you may need around four one-hour sessions to guide them through each step and ensure they understand the process. Once the site is published, occasional guidance on how to insert external content from Drive, which can be a bit challenging, will suffice.

During teacher training, I allocate the final session of the course for Google Sites. Participants have been producing different content throughout the course, and this final session allows them to compile everything they have done, including links and materials provided by the instructor, as well as their course evaluation. It’s incredibly satisfying for attendees because they have a single web address that contains the entire course, which is very useful for future reference and classroom use.
Google Sites is an intuitive and user-friendly tool that doesn’t require specific technical or programming skills. Whether you’re viewing or creating content, Google Sites offers a wealth of educational possibilities. It does have limited customization options, but that is expected given its user-friendly nature.
In conclusion, Google Sites is a highly recommended tool. Its simplicity, usability, accessibility, and educational potential make it a must-have for educators and students alike. With Google Sites, you can effortlessly create a fully functional website in just a few minutes. It offers students and teachers an easy-to-use content management system for sharing and publishing their work, resulting in visually appealing and practical outcomes.
So, what are you waiting for? Dive into the world of Google Sites and create your own website, whether it’s for personal or professional use. Get started today and have all your work, content, and information compiled in one convenient place. Let’s get to work! #AllIn
Video Tutorial: Google Sites with Raúl Diego
Additional Information and Resources:
- Google Sites
- Examples of Google Sites usage:
- Duátiza – Project Exhibition
- [Merezco un acceso – Service-Learning Examples](Link not available)
- [PRODIG at IES Don Bosco (Valverde del Camino) – School Project Website](Link not available)
- Information for families
- Note: Examples of student portfolios are not shown due to limited accessibility within the organization, as minors are involved.